Setup and Publish
This guide continues from Create Your First Agent. Brew has been created — now let's add its branding and make it live for users.
What You Will Do
| Step | Action |
|---|---|
| 1 | Explore the Config page |
| 2 | Upload Brew's logo and avatar |
| 3 | Update the welcome message |
| 4 | Preview changes before publishing |
| 5 | Publish and verify the live version |
Assets for This Tutorial
Download these two files before you start. They were created specifically for the Brew & Chat Cafe agent used in this series.
| File | Used for |
|---|---|
| brew-logo.png | Agent logo (light and dark mode) |
| brew-avatar.png | Agent avatar — circular coffee mug icon |
Save both files somewhere accessible on your computer.
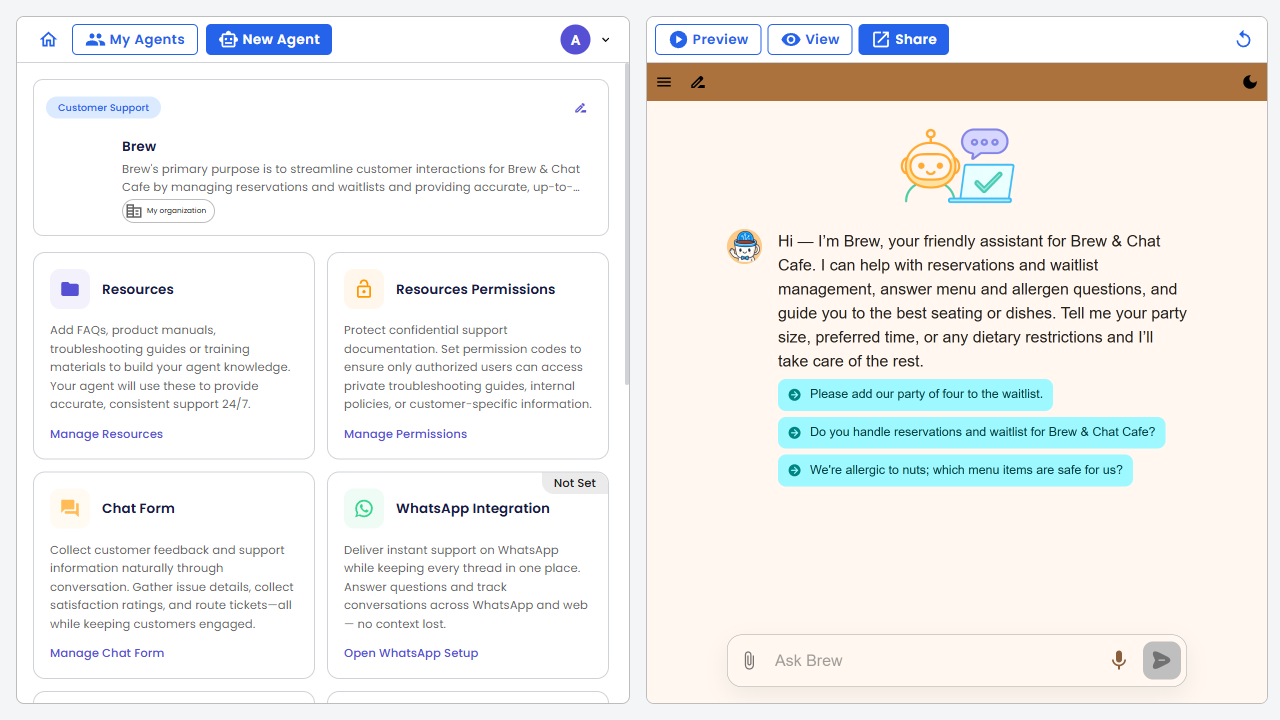
The Config Page
After creating Brew, you land on the Config page — the workspace where you manage everything about your agent.
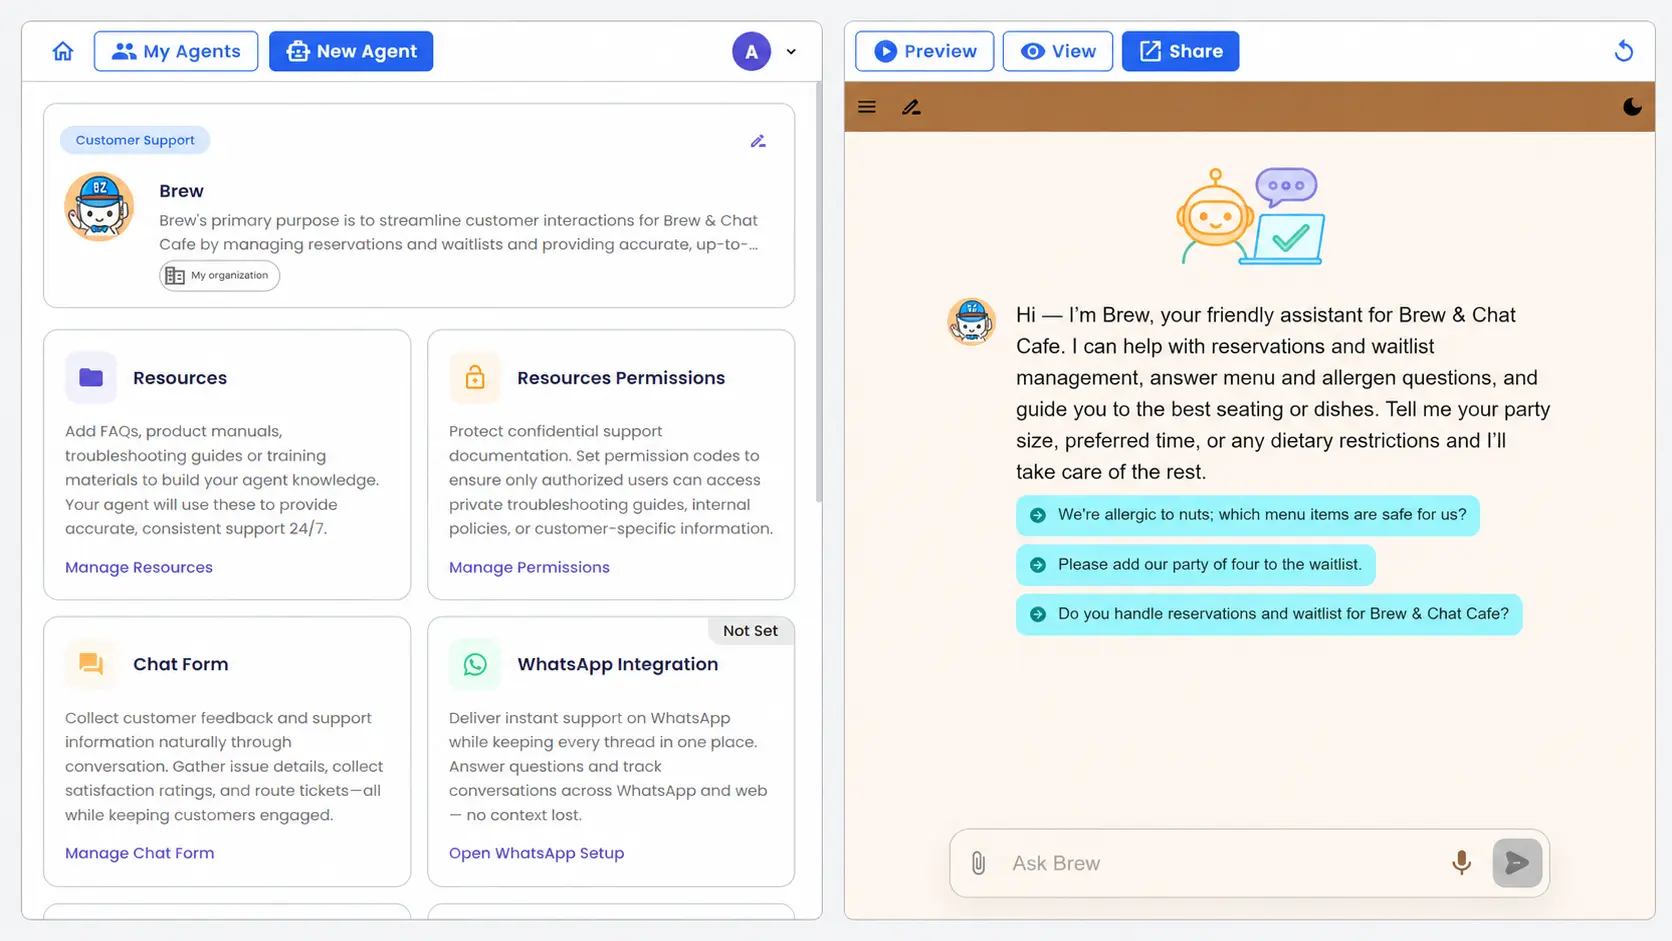
The page is divided into two zones:
| Zone | Contents |
|---|---|
| Left panel | Configuration sections tailored to your agent type |
| Right panel | A live in-page preview of the agent, always reflecting the latest saved state |
For a Customer Support agent like Brew, the left panel includes sections for Resources, Resource Permissions, Chat Form, and WhatsApp Integration.
The Config page adapts to your agent type. A Sales or HR agent will show different configuration sections.
At the top of the page, four action buttons control how you work with your agent:
| Button | What it does |
|---|---|
| Preview | Opens a dialog showing how Brew looks to users with the latest saved changes |
| Publish | Pushes all saved changes to the live version that users access |
| View | Opens the currently published version in a new browser tab |
| Share | Copies a shareable link to your agent |
To access the full dashboard with analytics, advanced settings, and all channels, click the Home icon (🏠) at the top-left corner.
Step 1 — Open Edit Agent Information
Click the pencil icon (✏) at the top-right corner of the Brew card in the left panel.

The Edit Agent Information dialog opens with three tabs:
| Tab | What you can edit |
|---|---|
| Profile | Agent name, code, logo, and avatar |
| Behavior | Communication style, proactiveness, and language |
| Introduction | Welcome message and example questions |
Step 2 — Upload Logo and Avatar
The dialog opens on the Profile tab. You will see empty upload areas for the logo and avatar.
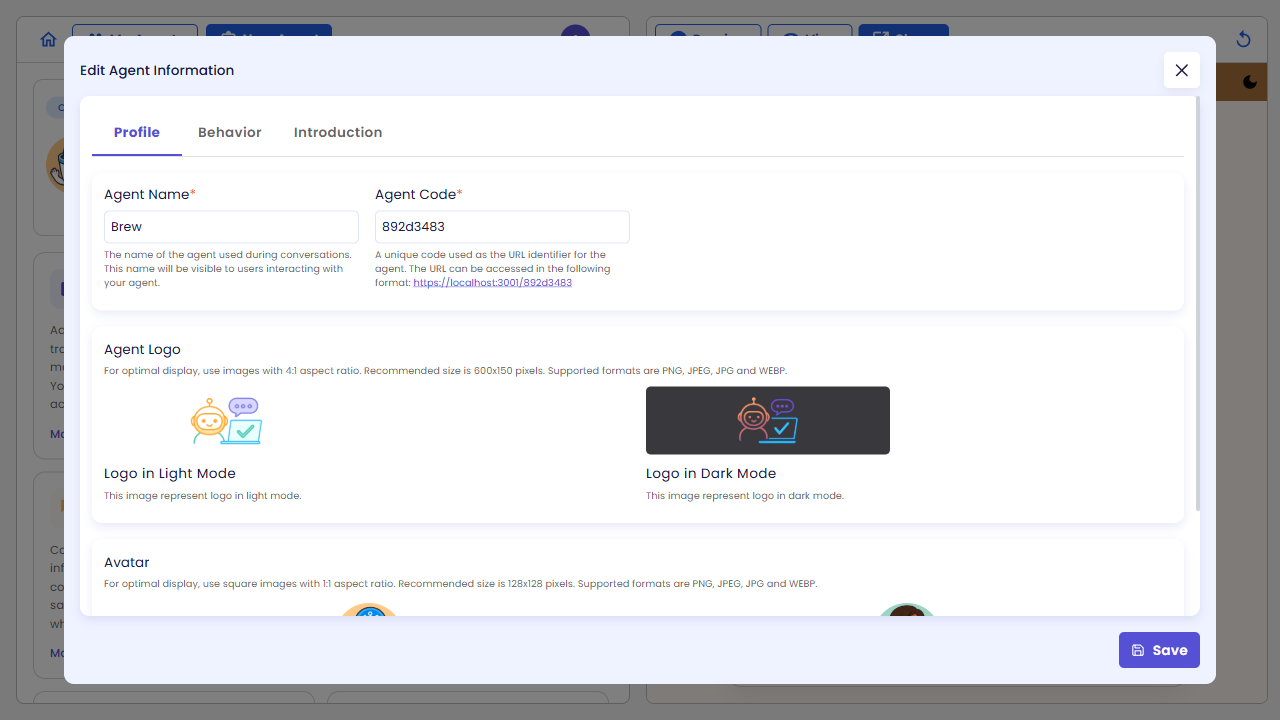
Upload the two files you downloaded:
- Click the Logo in Light Mode upload area → select
brew-logo.png - Click the Logo in Dark Mode upload area → select
brew-logo.png - Scroll down to the Avatar section
- Click Avatar in Light Mode upload area → select
brew-avatar.png - Click Avatar in Dark Mode upload area → select
brew-avatar.png
After uploading, both logo slots show the Brew & Chat Cafe logo and both avatar slots show the circular mug icon.
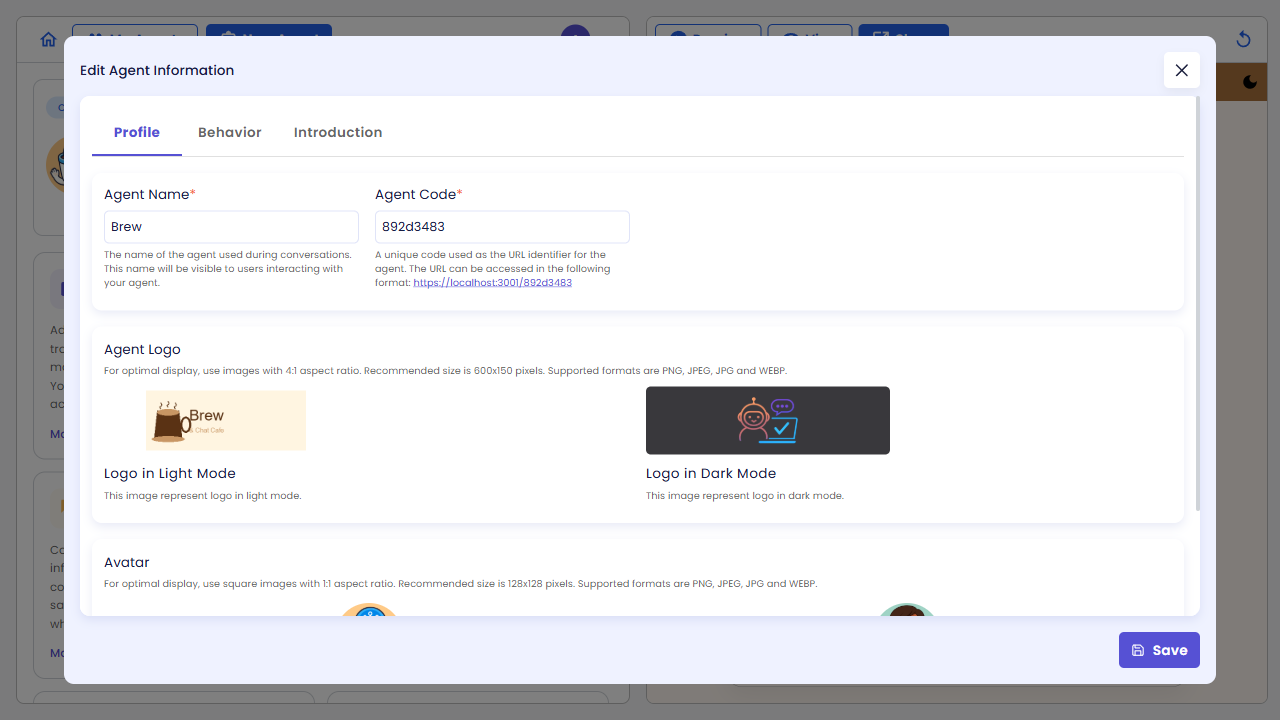
Do not click Save yet — you will update the introduction message first.
Step 3 — Update the Welcome Message
Click the Introduction tab.
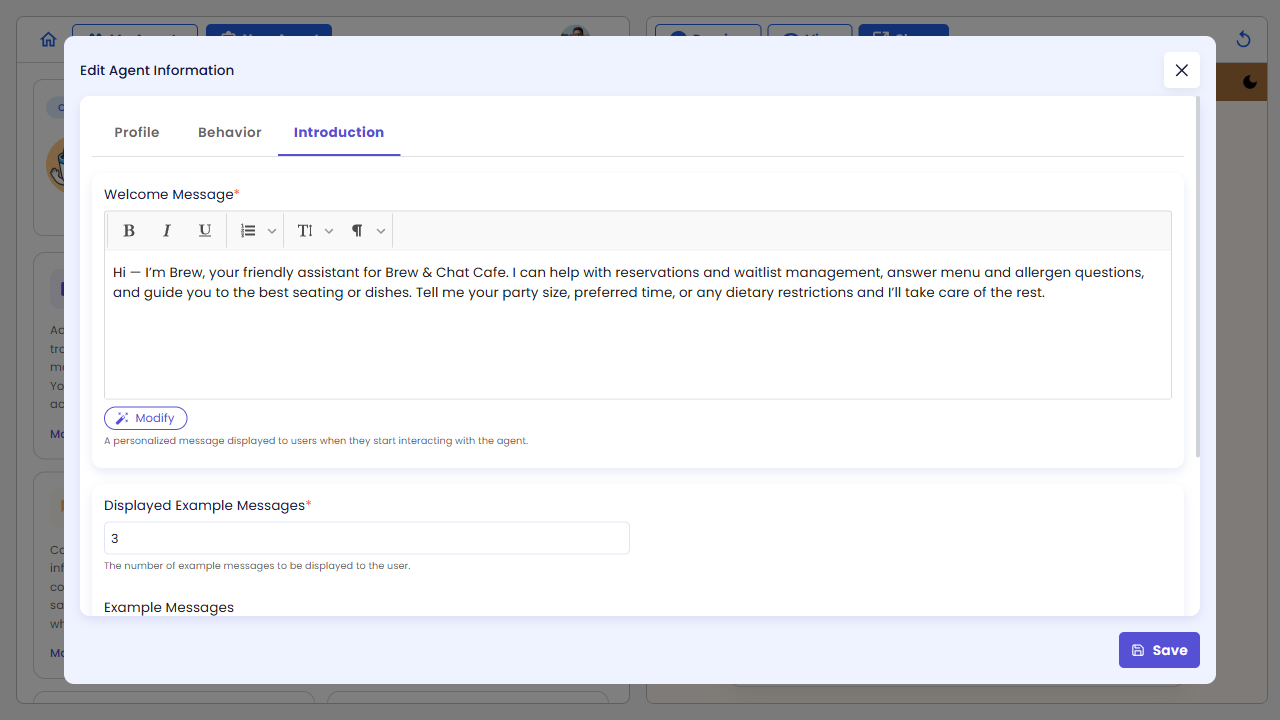
The Welcome Message is the first text users see when they open Brew. Select all the existing text and replace it with the following:
Hi there! 👋 I'm Brew, your friendly assistant at Brew & Chat Cafe. Whether you'd like to reserve a table, check our menu, or learn about our allergen-friendly options — I'm here to help. What can I do for you today?
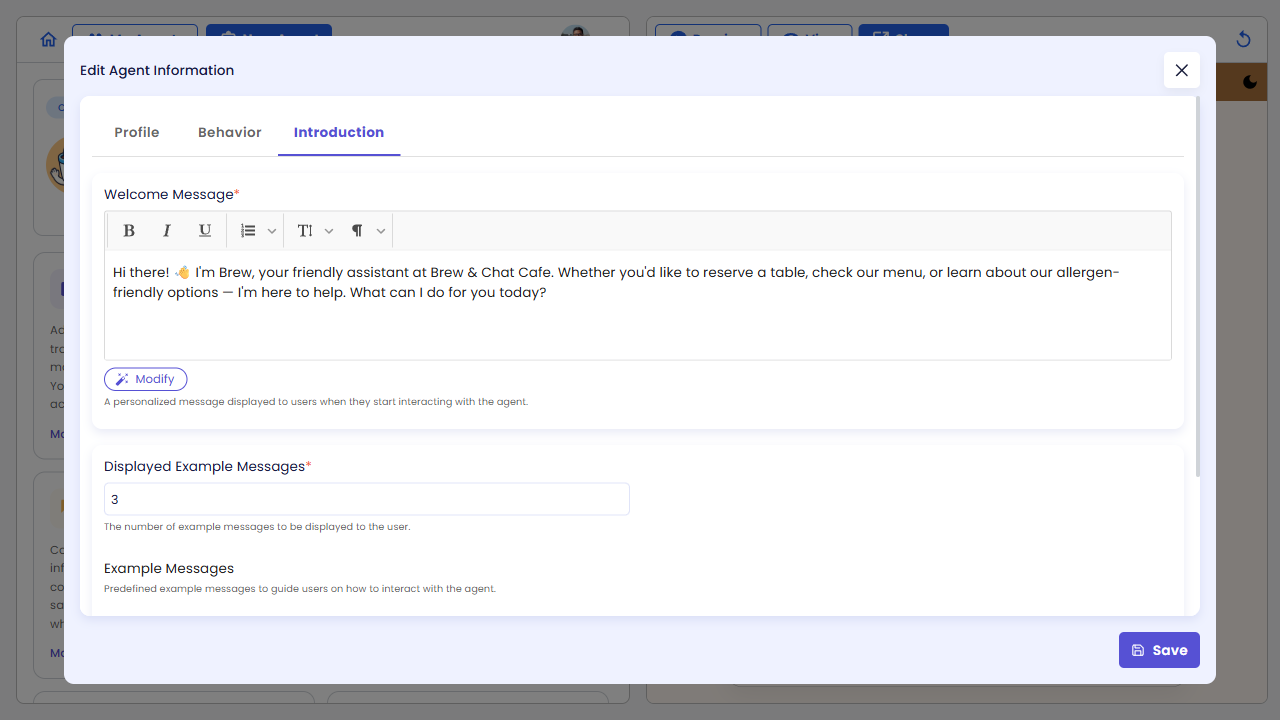
Click Save to apply all three changes — the logo, avatar, and welcome message are saved together.
Step 4 — Review the Config Page
After saving, the dialog closes and you return to the Config page. Brew's avatar (the circular mug icon) now appears in the agent card on the left.

Your changes are saved but not yet published. Users accessing the live agent will still see the original appearance.
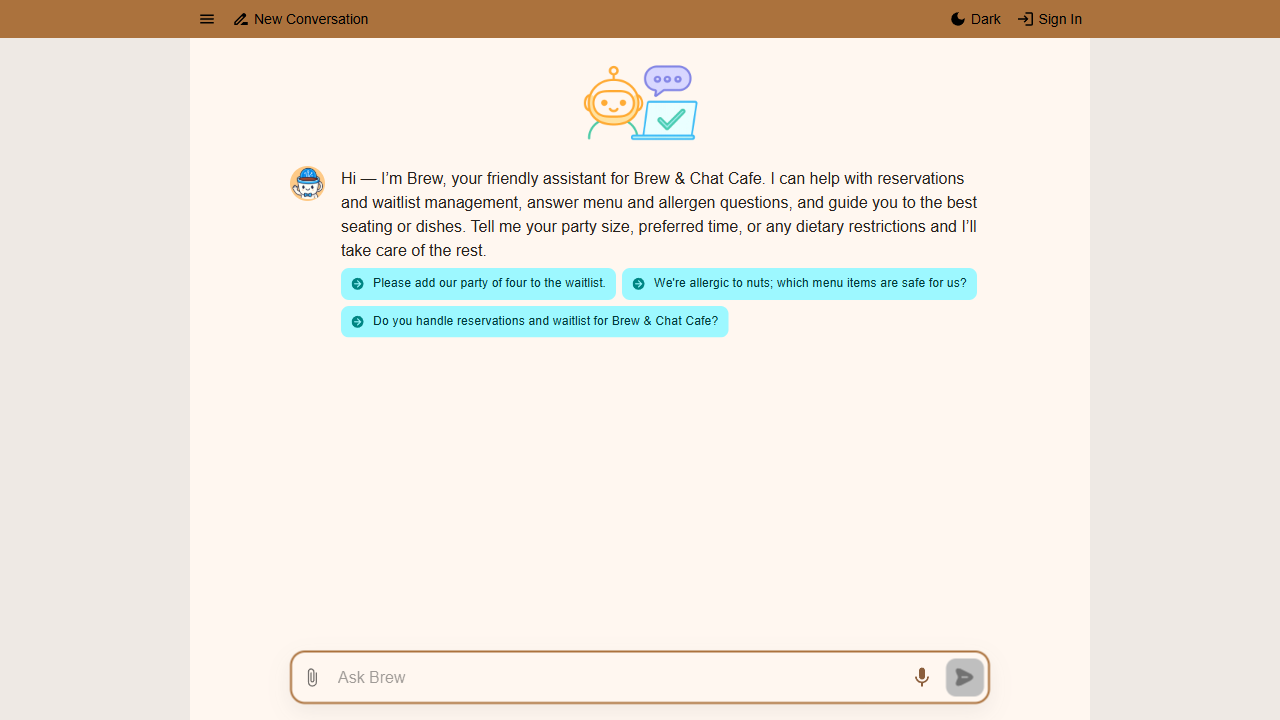
Step 5 — Preview Your Changes
Click Preview in the top navigation.
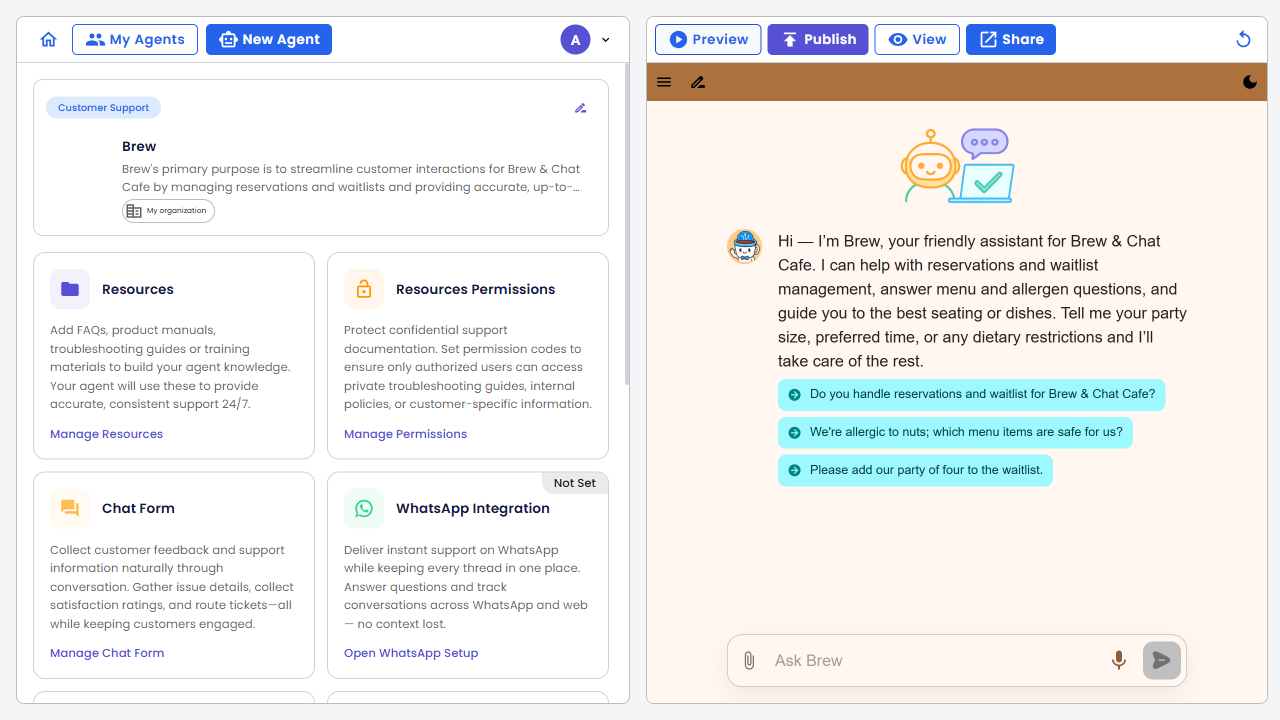
A preview opens showing how Brew will appear to users, using the latest saved version. You should see Brew's new avatar, the Brew & Chat Cafe logo, and the updated welcome message.
The preview always reflects your most recently saved configuration, even before publishing. This lets you verify changes safely without affecting live users.
Step 6 — View the Live Version Before Publishing
Click View in the top navigation. A new browser tab opens showing the currently published version of Brew.
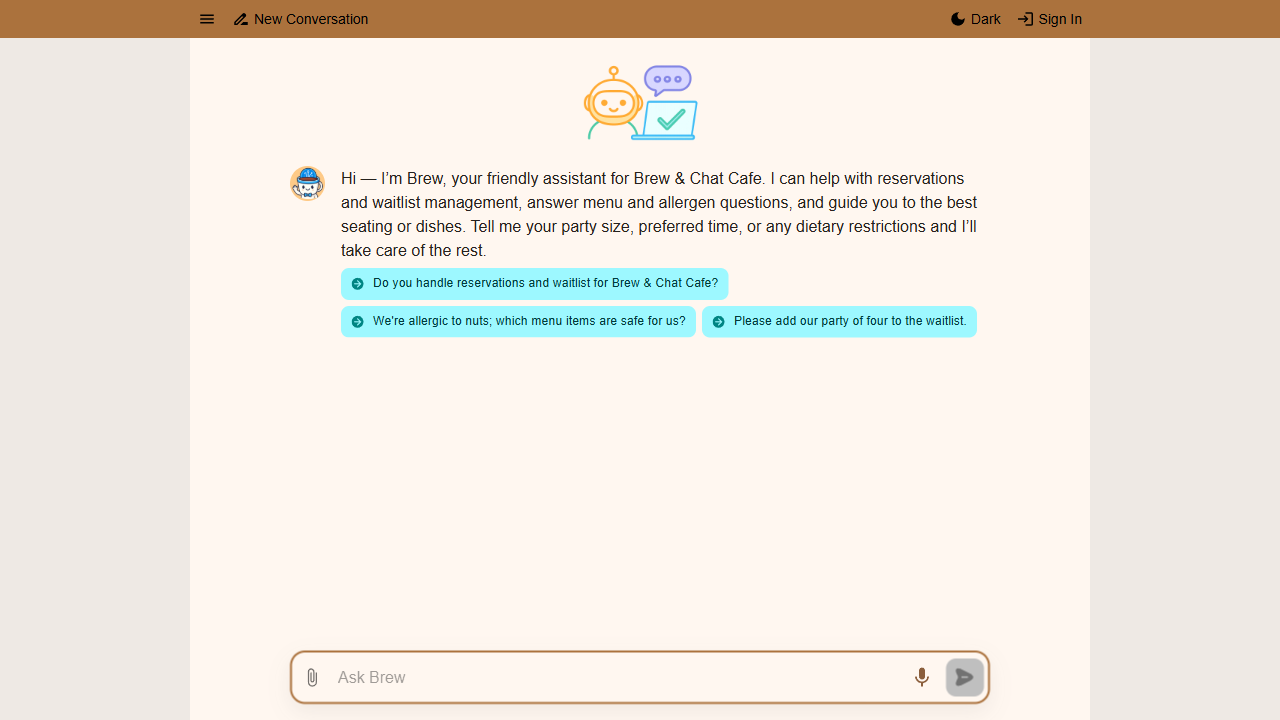
This is what users currently see. Your edits — the new logo, avatar, and welcome message — are saved in the editor but have not yet been pushed to this live version.
Close this tab and return to the Config page.
Step 7 — Publish the Agent
Click Publish in the top navigation.
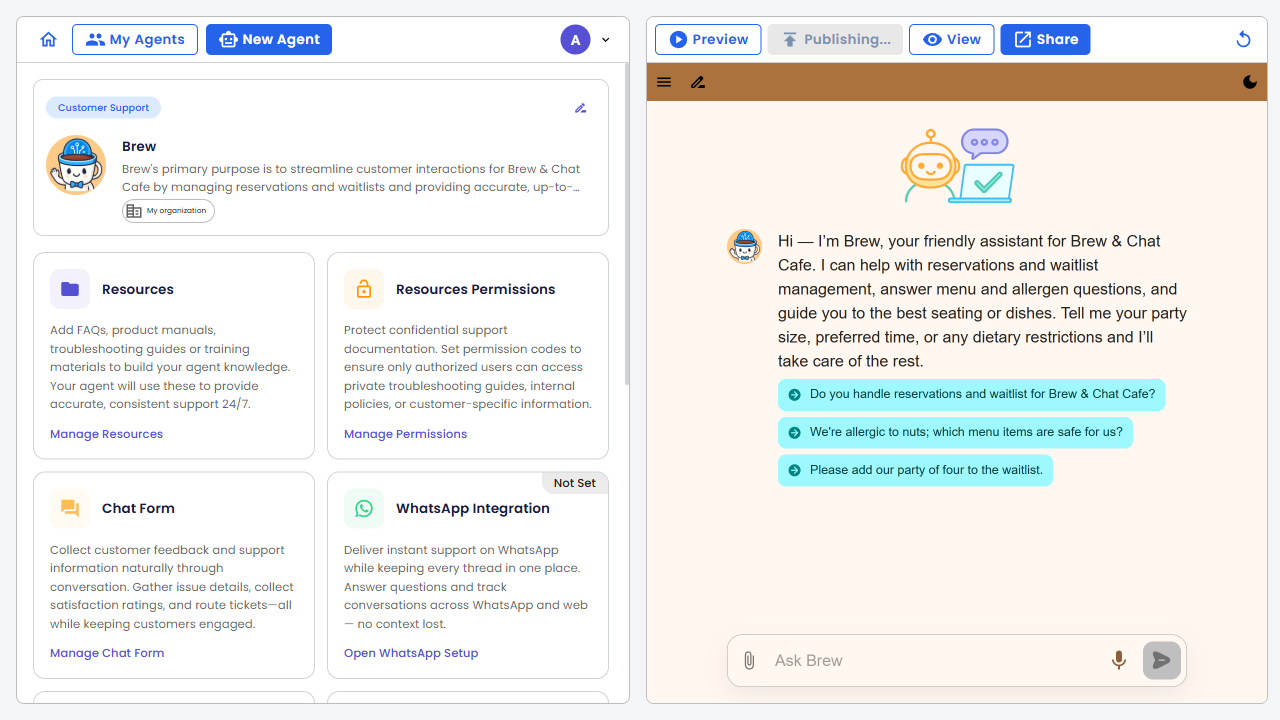
The button briefly shows Publishing... while the changes are applied. When complete, the Publish button disappears from the top navigation — indicating the published version is now in sync with your saved configuration.
Step 8 — Verify the Published Version
Click View again.
The live version now reflects everything you published. Users who open Brew will see the updated avatar, the new logo, and the new welcome message. The changes are live for everyone.
What's Next?
| If you want to… | Go to |
|---|---|
| Add a real menu or FAQ to Brew | Resources |
| Connect Brew to WhatsApp | WhatsApp Integration |
| Customize Brew's personality and tone | Manage Persona & Appearance |