Configure Escalation
Open in CMSThis tutorial walks you through the simplest end-to-end escalation setup in CMS: enable escalation, add one trigger condition, assign supervisors, and open the queue for testing.
Before you start
- Read Hand Off to a Human for how escalation works and the short preparation checklist.
- Your agent answers well in Preview. See Preview and Publish Changes.
- The people who will act as supervisors are already members of the agent. See Manage Who Can Use and Build.
Scenario Used in This Tutorial
We use an angry-user support case so your first configuration is realistic.
| Field | Value |
|---|---|
| Agent | E-commerce support assistant |
| Trigger sample | User is angry and asks for urgent refund handling |
| Target handoff | Human supervisor |
Step 1 -- Open Escalation Settings
Move your pointer over the icon sidebar on the left edge of the CMS to expand it (on a narrow screen, click the menu button (☰) at the top left instead). Then open Conversation → Escalation.
You should see the Escalation page with the cards Escalation, Trigger Conditions, Escalation Response Message, Supervisors, Webhook, and Escalation Queue.
If this is your first setup, spend one minute scanning all sections before editing so you understand where each configuration belongs.
Step 2 -- Enable Escalation
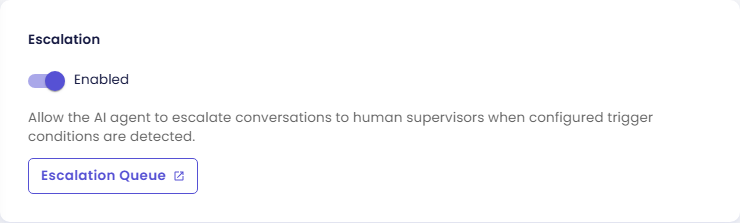
In the top card, switch Escalation from Disabled to Enabled.
Once enabled, the other configuration cards become actionable.
After toggling on, confirm the page no longer shows disabled states for Trigger Conditions and Supervisors.
Step 3 -- Add Trigger Conditions
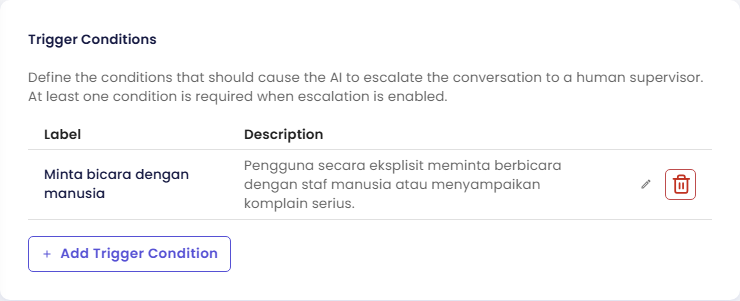
In Trigger Conditions, create at least one condition the AI can detect.
For this tutorial, add a condition like:
| Field | Example value |
|---|---|
| Label | Angry Customer Escalation |
| Description | Escalate when user expresses anger, repeated complaint, or asks immediate human intervention. |
Write descriptions as natural instructions for AI detection, not as technical labels only.
For better precision, include both emotional and intent signals in one description, such as anger + urgent refund request.
Step 4 -- Configure Escalation Response Message
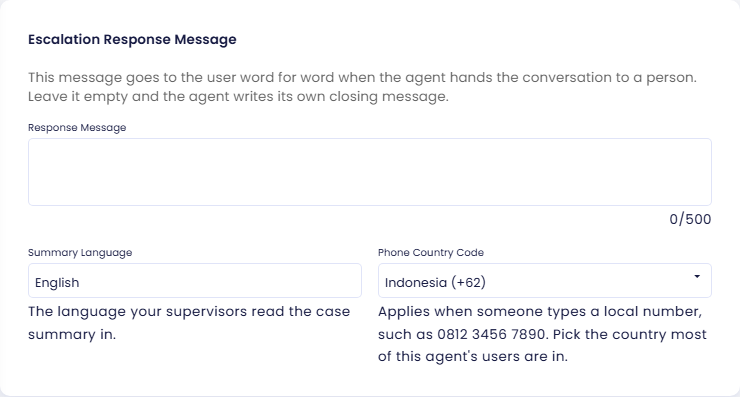
In the Escalation Response Message card, fill in Response Message: the text sent to the user, word for word, when the agent hands the conversation to a person. It can be up to 500 characters. If you leave it empty, the agent writes its own closing message instead.
Example message:
I understand this issue is urgent. I have escalated your conversation to a human supervisor, and they will continue from here as soon as possible.
Keep this message empathetic and explicit, so users know the handoff is happening.
Avoid vague wording like "please wait" without confirming that a human has been notified.
Step 5 -- Set Summary Language
In the same card, choose Summary Language for AI-generated escalation summaries (for supervisors).
For a first setup, use English.
Choose a language your supervisors use daily so summaries are immediately actionable without translation.
Step 6 -- Set Phone Country Code
Still in the same card, choose Phone Country Code. When a user gives a phone number in local form (for example 0812 3456 7890), the agent turns it into an international number with this country code, so supervisors can contact the user (for example through a WhatsApp link). The default is Indonesia (+62).
Pick the country where most of this agent's users are.
Step 7 -- Assign Supervisors
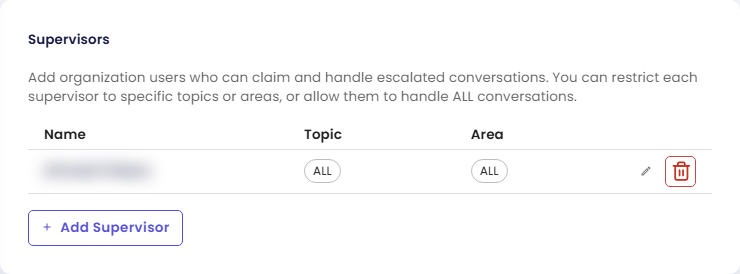
Open Supervisors and add one or more people who will receive and handle escalations.
For each supervisor, define optional routing scopes:
| Field | Purpose |
|---|---|
| Topics | Route only specific subjects (billing, refund, complaint, etc.) |
| Areas | Route by area/domain (order, payment, delivery, etc.) |
If you are just starting, assign one supervisor without extra filters first.
After the first successful test run, add topic/area scopes gradually to avoid misrouting cases during early rollout.
Step 8 -- Save Configuration
Click Save at the bottom of the page.
Your escalation settings are now stored for the current agent configuration. Like other agent settings, they are saved as a draft first: they reach live users only after you click Publish (see Preview and Publish Changes).
If save fails, resolve validation messages first and save again before opening the queue.
Step 9 -- Open Escalation Queue (Preview and Published)
In Escalation Queue, you will find two buttons:
- Open Preview Queue: tests queue behavior using draft configuration.
- Open Published Queue: uses the live published agent behavior.
Start with Preview Queue for validation before publishing to production.
Use Published Queue only after your draft flow passes end-to-end checks (trigger, claim, summary, and completion).
Check the result
Before moving to real-time operations, verify:
- Escalation toggle is enabled
- At least one trigger condition exists
- The escalation response message says what you want users to read (or is empty, if you prefer the agent to write its own)
- Phone Country Code matches the country of most of your users
- At least one supervisor is assigned
- Save action succeeds without validation errors
Then, in the Preview chat, send one message that matches your trigger condition (for example, an angry request for an urgent refund). The agent should reply with your escalation response message, and a new case should appear in the Preview Queue.
Next steps
- Next in the journey: Receive and Manage Escalations, to claim and resolve the case you just created.
- Notify other tools: Send Escalation Events to a Webhook.