Voice Screen and On-Screen Content
Open in CMSOn this page you decide what users see while they talk to your agent: a full-screen immersive view or a transcript, the welcome text on an empty screen, attachments during a call, and which content appears on screen (the canvas) instead of being spoken.
All of these settings are on the Agent Voice page (Conversation → Voice in the CMS sidebar) and appear only when Voice conversations is on.
Before you start
- Turn on Voice conversations on the Talk by Voice page.
- For attachments during a call, set what users may attach on Model & Context → Attachments.
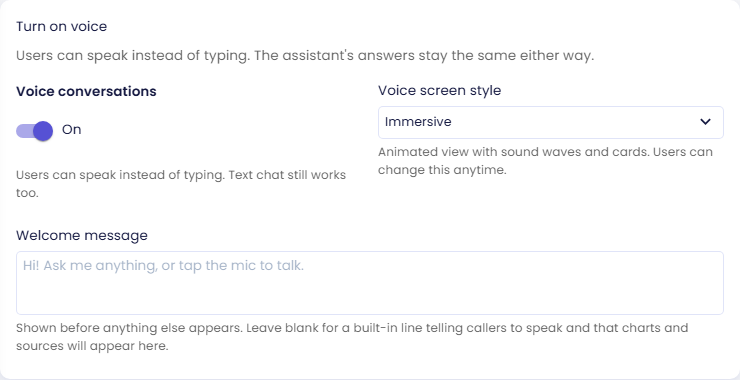
Voice screen style
Found in the Turn on voice card. Controls how a voice session is presented the moment it starts:
| Value | What the user sees |
|---|---|
| Immersive (default) | A full-screen, voice-only view: a sound-wave animation reacting to who is speaking, no visible transcript text. Charts, tables, and cited sources produced during the call appear as swipeable pages in a canvas pager instead. |
| Transcript | A text-style view: the spoken conversation is shown as a scrolling transcript of chat bubbles, same as a regular chat thread, with clickable citations and a text box to type into mid-call. |
This is only the starting point: the end user can still switch to the other display from their own preferences once a call is underway.
Welcome message
Also in the Turn on voice card. Free text displayed in the immersive view while the canvas is still empty, before any chart, table, or source page has arrived. Leave blank to use the built-in default placeholder ("Speak to the assistant. Charts, tables and sources will appear here as pages you can browse.").
Don't confuse it with the Welcome Message on the Introduction page: that one greets users in the chat, and it is also what the voice sample speaks on the Assistant's voice setting.
Attachments during an immersive call
In the immersive view, an attach button sits right of the microphone. Users can pick an image or a document (on a phone: Camera, Photo, or Files), and it appears as a small preview above the call controls — the same boxes the chat input shows.
There is no send button in a voice call, so an attachment waits: it goes to the assistant together with the next thing the user says (or, in push-to-talk, when they release the talk button), and the preview clears once it has been sent. Until then the user can remove it. The assistant then answers that spoken question with the file in view — for example, "what's the plate number on this receipt?" with a photo of the receipt attached.
What can be attached is controlled on Model & Context → Attachments: the same Allow Image Upload, Allow Document/File Upload, and Document Upload Restrictions that apply to chat, checked the same way when the file is uploaded.
A few differences from chat worth knowing:
- Images depend on the conversation style. With Turn-by-turn they always work: the voice reads images itself, whichever conversation model the agent uses for chat. In Natural conversation the voice can't see images — an image goes to the Answering AI model instead, and during the beta only some Answering AI models take images in a call. When they can't, the attach button offers documents only.
- Documents are read as text, exactly as in chat. Because a voice session holds far less context than a text conversation, only roughly the first 12,000 characters of a document (24,000 across the files sent together) reach the assistant. It is told when a document was shortened, so it can say the answer may be in the part it didn't see. The full text is still recorded in the conversation. In Natural conversation the text goes to the Answering AI model: roughly the first 8,000 characters of each document for Qlar's built-in models, while custom models receive documents the way they do in chat.
- Attachments are recorded on the conversation with the user message they were sent with, so they show up in conversation history like chat attachments do.
On-screen content
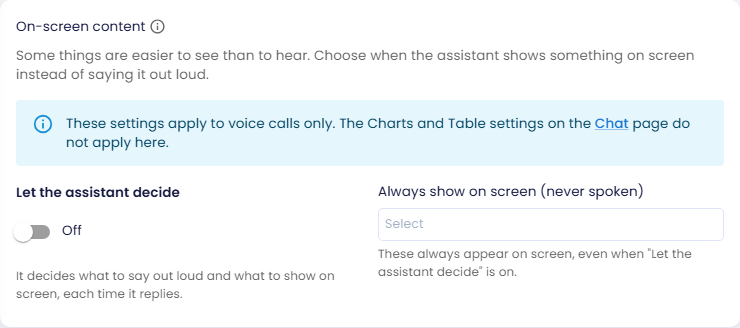
During a voice call, some content is better shown on screen (the canvas) than spoken aloud: charts, tables, long lists, code, math, scripture, or anything that reads awkwardly out loud. These settings control when the AI assistant pushes content to the canvas instead of speaking it directly. They apply to voice calls only; the Charts and Table settings on the Chat page do not apply here.
On WhatsApp, the assistant can send what's currently on the canvas as a WhatsApp message mid-call. If the organization has Privacy Mode on, this is turned off.
Let the assistant decide
When on, the AI decides for itself, response by response, which parts to speak conversationally and which parts to show on the canvas instead, not limited to charts and tables. Leave this off if you'd rather rely only on the explicit list below.
Always show on screen (never spoken)
A list of free-text content types (for example chart, table, arabic scripture, mathematical formula, cards) that must always be rendered on the canvas instead of spoken as plain text, whenever a response contains that kind of content. This applies regardless of whether Let the assistant decide is on.
Pick a suggestion or type your own content type and press Enter; remove one with the × on its chip. This only changes where the content is rendered — the agent still speaks whatever explanation the answer calls for alongside it.
Immersive view instructions
The field What the assistant should do in the immersive view is free text added to the AI assistant's instructions only for calls the user is watching in the immersive view. A call shown as a transcript never receives them, because there the answer is already readable as text — instructions written for a screen with nothing to read ("show it, don't say it") would work against that.
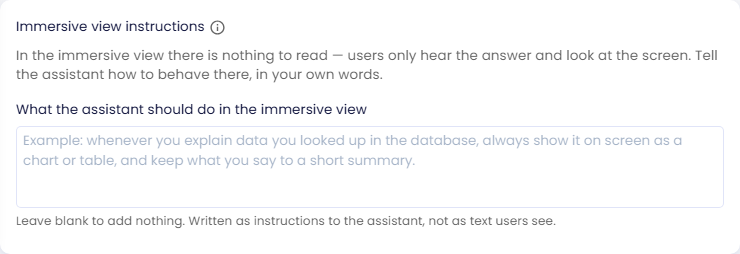
Write it as instructions to the assistant, not as text the user sees. For example:
Whenever you explain data you looked up in the database, always show it on screen as a chart or table, and keep what you say to a short summary.
Where these instructions conflict with the On-screen content settings above, these win, because they are added last. Leave the field blank to add nothing at all.
Because Voice screen style is only a starting point, an agent set to Transcript can still have users who switch to the immersive view themselves, and they will get these instructions; the page says so when that is your configured default.
In Natural conversation, these instructions also guide the Answering AI model, which prepares what's shown on screen. The voice itself receives only roughly the first 4,000 characters, and the page warns when the text is longer.
Check the result
- Click Save.
- Start a voice conversation in the preview (+ menu next to the chat input). The call should open in the voice screen style you chose, showing your welcome message while the canvas is empty.
- Ask for something that belongs on screen, such as a table or a chart of data your agent can look up. It should appear as a page on the canvas while the assistant speaks a short explanation.
- If attachments are allowed, attach an image or document and ask a question about it.
Next steps
- Natural Conversation Settings: if you use Natural conversation.
- Next in the journey: Remember Each User.
- Back to Talk by Voice for conversation styles and billing.